
Is your Vivo Y21 sporting a cracked or unresponsive screen? A broken display can feel like a major setback, but it doesn’t have to mean the end of your device. For those with a technical mindset and a steady hand, replacing the Vivo Y21 combo screen is a manageable task. This process not only saves you money but also provides invaluable hands-on experience in the world of mobile repair.
This guide will walk you through the entire replacement process, step by step. We’ll cover the necessary tools, safety precautions, and the detailed procedure for giving your phone a new lease on life. This is a perfect introductory project for anyone curious about a career in mobile technology. If you discover a passion for this kind of work, you might even consider formal training at a leading Mobile Repairing Institute In Ghaziabad to turn your interest into a profession.
Let’s dive in and fix that screen.
Preparing for the Repair: Tools and Safety
Before you begin any smartphone repair, gathering the right tools and setting up a safe workspace is crucial. Rushing this step can lead to further damage to your device or even personal injury. Think of it like a surgeon preparing for an operation; precision and preparation are key.
Essential Tools for Screen Replacement
You don’t need a state-of-the-art lab, but a few specific tools will make the job much smoother and safer for your device’s delicate components.
- iFixit Opening Picks or Plastic Prying Tools: Metal tools can scratch or crack the phone’s plastic frame. Plastic picks are essential for safely separating the back panel and other components.
- Screwdriver Kit: A precision screwdriver set with various small bits (including Phillips #000) is necessary to remove the tiny screws holding the internal components.
- Heat Gun or Hair Dryer: You’ll need a gentle heat source to soften the adhesive holding the back panel and the old screen in place.
- Suction Cup: A small suction cup helps lift the back panel and the screen without applying excessive force.
- Tweezers: Fine-tipped tweezers are invaluable for handling small connectors and screws.
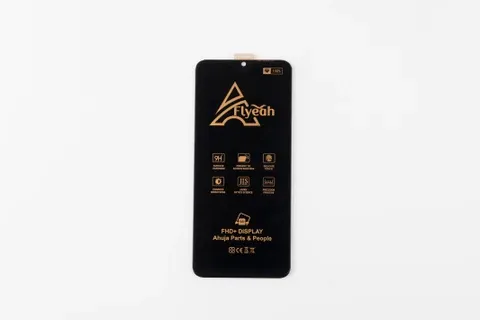
- New Vivo Y21 Combo Screen: Ensure you have a high-quality replacement display assembly. This includes both the LCD screen and the digitizer (touchscreen).
- B-7000 or T-7000 Adhesive: This specialized glue is used to secure the new screen to the frame.
- Isopropyl Alcohol and Microfiber Cloth: For cleaning old adhesive and fingerprints from the frame and internal components.
- Clamps or Rubber Bands: To hold the new screen in place while the adhesive cures.
Setting Up Your Workspace
Choose a well-lit, clean, and flat surface. A magnetic mat can be a lifesaver for organizing the tiny screws you remove. Keeping track of which screw goes where is vital for successful reassembly. Lay out your tools so they are easily accessible. Just as professionals in Perth’s tech workshops maintain organized stations, a tidy space minimizes the risk of losing small parts.
Safety First
- Power Down: Always turn the phone completely off before starting the repair.
- Disconnect the Battery: The first component you should disconnect after opening the phone is the battery connector. This prevents any accidental short circuits.
- Handle with Care: The internal components, especially the flexible ribbon cables, are extremely delicate. Avoid using force.
Step-by-Step Guide to Replacing the Vivo Y21 Combo Screen
Now that your workspace is ready, it’s time to begin the disassembly process. Follow these steps carefully.
Step 1: Heat and Remove the Back Panel
The back panel of the Vivo Y21 is held on by strong adhesive.
- Use your heat gun or hair dryer on a low setting. Gently heat the edges of the back panel for about 60-90 seconds. This will soften the glue.
- Press a suction cup onto the bottom of the back panel and pull up gently to create a small gap.
- Insert a plastic opening pick into the gap. Slide the pick along the edges of the phone to slice through the adhesive. You may need to apply more heat as you go.
- Once the adhesive is cut all around, you can lift the back panel off. Be careful, as the fingerprint sensor might be connected to the motherboard with a delicate cable.
Step 2: Disconnect the Fingerprint Sensor and Remove the Mid-Frame
With the back panel off, you’ll see the internal layout.
- Locate the screws holding the plastic shield over the motherboard. Use your precision screwdriver to remove them.
- Carefully lift the shield. You will see the fingerprint sensor connector. Use a plastic prying tool or your fingernail to gently pop it off.
- Now, remove all the screws holding the main mid-frame in place. Keep them organized!
- Once all screws are removed, you can gently pry off the mid-frame to expose the motherboard and battery.
Step 3: Disconnect the Battery and Other Components
This is a critical safety step.
- Locate the battery connector on the motherboard. It’s a small, press-fit connector. Use your plastic prying tool to disconnect it.
- Next, locate the ribbon cable for the display screen. It will be a flat, flexible cable running from the bottom of the phone up to the motherboard. Disconnect it in the same way.
- If any other cables are obstructing your path to the screen, disconnect them carefully, noting their positions for reassembly.
Step 4: Remove the Damaged Vivo Y21 Combo Screen
With the internal components disconnected, you can now focus on the broken touchscreen display.
- Flip the phone over. Apply gentle heat to the edges of the front screen, just as you did with the back panel.
- Use a plastic pick to carefully pry the damaged screen away from the frame. If the screen is heavily shattered, be cautious of glass shards. Safety glasses are a good idea.
- Work your way around the entire screen until it is free from the frame. The display’s ribbon cable will need to be carefully fed through the opening in the frame.
Step 5: Clean the Frame and Test the New Screen
A clean surface ensures a strong bond for the new screen.
- Use isopropyl alcohol and a microfiber cloth to thoroughly clean the phone’s frame, removing all traces of old adhesive and glass fragments.
- Before applying new adhesive, it’s wise to perform a dry test. Carefully connect the new Vivo Y21 combo screen’s ribbon cable to the motherboard.
- Reconnect the battery. Power on the phone to test the new display. Check for dead pixels, touch response, and proper color display.
- Once you’ve confirmed the new screen works perfectly, power the phone down and disconnect the battery and the new screen again. This step is crucial; you don’t want to glue in a faulty part.
Step 6: Install the New Screen
Now for the final installation.
- Apply a thin, even bead of B-7000 or T-7000 adhesive around the perimeter of the phone’s frame where the new screen will sit. Be careful not to use too much, as excess glue can seep into internal components.
- Carefully feed the new screen’s ribbon cable through the slot in the frame.
- Align the new screen with the frame and gently press it into place. Ensure it is flush and seated correctly.
- Use clamps or rubber bands to apply light, even pressure around the edges of the screen. This helps the adhesive form a strong bond. Let it cure for at least a few hours, or as recommended by the adhesive manufacturer.
Step 7: Reassembly
Once the adhesive has cured, you can reassemble the phone by reversing the steps.
- Connect the new screen’s ribbon cable to the motherboard.
- Reconnect the battery.
- Reconnect any other cables you may have disconnected.
- Place the mid-frame back into position and secure it with its screws.
- Reconnect the fingerprint sensor.
- Place the plastic shield over the motherboard and secure it.
- Finally, apply a thin line of new adhesive to the frame if needed and press the back panel back into place. Use clamps or rubber bands again to let it cure.
Turning a Skill into a Career
Congratulations! You’ve successfully replaced a Vivo Y21 combo screen. This process gives you a real taste of the detailed work involved in mobile hardware repair. You’ve dealt with delicate connectors, adhesives, and the logical steps of disassembly and reassembly.
If you enjoyed this process and found yourself wanting to learn more, this could be more than just a hobby. The mobile repair industry is booming. From local repair shops in bustling areas like Ghaziabad to specialized service centers, the demand for skilled technicians is high.
This is where formal training comes in. While DIY guides are great for a single repair, a professional course provides the deep knowledge needed for a career. A top-tier Mobile Repairing Institute In Ghaziabad will teach you:
- Advanced Diagnostics: Learn to identify complex software issues and hardware faults beyond a simple screen replacement.
- Chip-Level Repair: Master soldering and microsoldering techniques to fix problems on the motherboard itself, a highly valuable skill.
- Troubleshooting Various Models: Gain experience with a wide range of devices, from iPhones to various Android models, not just the Vivo Y21.
- Business Acumen: Learn how to start and run your own successful mobile repair business.
Completing a professional mobile repairing course equips you with the confidence and certification to handle any repair job. You’ll understand the theory behind the practice, from how a power IC works to diagnosing complex network problems. This expertise is what separates a hobbyist from a professional technician who can build a successful career, perhaps even opening a shop like the ones you see in Perth or your own local community.
Your Next Step
Repairing a Vivo Y21 combo is a fantastic achievement and an excellent entry point into the world of electronic repair. You’ve proven you have the patience and attention to detail required. Now, imagine being able to diagnose why a phone isn’t charging, fix water damage, or even recover data from a seemingly dead device.
These advanced skills are within your reach. Enrolling in a comprehensive program can transform your interest into a lucrative and rewarding profession. You’ll learn from experts, work with professional tools, and gain the hands-on experience needed to tackle any challenge.
If this guide has sparked your curiosity, don’t let it fade. Explore the opportunities that a formal education in mobile repair can offer. Contact Vaishno Mobile, a leading Mobile Repairing Institute In Ghaziabad, to learn more about our courses and take the first step towards becoming a certified mobile technician.
Leave a Reply